The world of electronics is ever-evolving, and with it comes an exciting array of tools that empower makers, hobbyists, and professionals alike. One such innovative device is the Antennino Arduino 433MHz RF Board.
This versatile board opens up a realm of possibilities for wireless communication in various projects. Whether you’re looking to control devices from afar or create smart home solutions, this board has got you covered.
With its compact design and user-friendly interface, the Antennino makes it easy to dive into the fascinating world of radio frequency (RF) technology.
As you explore its features and capabilities, you’ll discover how this little powerhouse can enhance your DIY endeavors while providing seamless connectivity.
Join us as we dissect the key aspects of the Antennino Arduino 433MHz RF Board—from its compatibility options to real-world applications. Get ready to unlock new ideas that will elevate your projects!
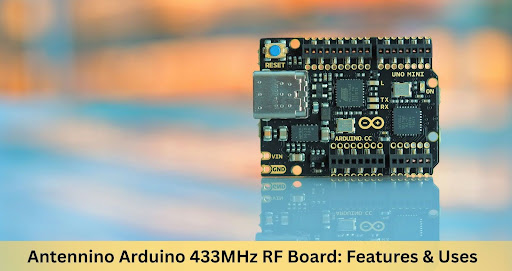
What Is the Antennino Arduino 433MHz RF Board?
The Antennino Arduino 433MHz RF Board is a compact and powerful device designed for wireless communication. Operating within the 433MHz frequency range, it allows users to send and receive data over short distances without the need for physical connections.
This capability makes it an ideal choice for various applications in the Internet of Things (IoT) ecosystem.
Equipped with advanced RF technology, this board can easily communicate with other devices that support similar frequencies.
Its versatility enables integration into multiple projects ranging from home automation systems to remote control applications. The ease of use further enhances its appeal among hobbyists and professionals alike.
One standout feature of the Antennino board is its compatibility with popular microcontrollers like Arduino, making development straightforward.
Users can leverage existing libraries to simplify coding processes, allowing them to focus on creativity rather than technical hurdles.
Additionally, its small size ensures that it fits perfectly into tight spaces while remaining lightweight—perfect for portable projects or battery-operated devices.
With growing interest in DIY electronics, having access to reliable components like the Antennino 433MHz RF Board becomes increasingly essential.
This board not only promotes innovation but also encourages experimentation in wireless communications, positioning itself as a must-have tool in any maker’s toolkit.
Key Features of the Antennino Arduino 433MHz RF Board
The Antennino Arduino 433MHz RF Board boasts impressive features that make it a popular choice among hobbyists and professionals alike.
First and foremost, its operating frequency of 433 MHz allows for reliable wireless communication. This frequency is well-suited for various applications, ensuring compatibility with multiple devices.
Another standout feature is the onboard antenna. It enhances the board’s performance by providing improved signal strength over longer distances.
Users can expect clear transmission and reception, making it ideal for remote controls or sensor networks.
Additionally, this board offers low power consumption. This aspect is crucial when designing battery-operated projects since it extends battery life significantly. Developers can create energy-efficient solutions without sacrificing functionality.
Compatibility is another highlight of the Antennino Arduino 433MHz RF Board. It seamlessly integrates with Arduino platforms and various microcontrollers, allowing users to leverage existing libraries and resources easily.
This makes getting started simple for beginners while still meeting advanced users’ needs.
Extensive documentation supports this board’s use cases effectively—guides are available online to help troubleshoot common issues or enhance project designs further.
With these key features combined, the Antennino stands out as a versatile tool in any maker’s toolkit.
Compatibility and Pinout of the Antennino Arduino 433MHz RF Board
The Antennino Arduino 433MHz RF Board is designed with versatility in mind, making it compatible with a variety of microcontrollers and development platforms. It works seamlessly with popular boards like Arduino Uno, Mega, and Nano. This compatibility opens up numerous possibilities for hobbyists and developers alike.
Understanding the pinout configuration is crucial for effectively utilizing the board. The standard layout features pins for power (VCC), ground (GND), data transmission (TX), and data reception (RX).
Each pin plays a vital role in ensuring smooth communication between devices.
Typically, the VCC pin operates at 5V while GND provides a common reference point. The TX and RX pins enable bidirectional communication over radio frequencies.
Users can easily connect these pins to their microcontroller’s corresponding inputs or outputs.
In addition to basic connectivity, some versions of the Antennino board include extra functionality through additional GPIO (General Purpose Input/Output) pins.
These can be programmed as needed to expand project capabilities further.
Whether you’re building remote controls or sensor networks, knowing how to wire up the board will enhance your project’s reliability significantly. Proper setup ensures efficient operation from start to finish.
How to Set Up the Antennino Arduino 433MHz RF Board
Setting up the Antennino Arduino 433MHz RF Board is a straightforward process, perfect for beginners and experienced users alike. Start by gathering all necessary components: the board itself, an Arduino compatible microcontroller, a breadboard, jumper wires, and any additional sensors or devices you plan to use.
Begin by connecting the RF module to your Arduino. The typical pin configuration includes VCC to power it with 5V from the Arduino and GND connected to ground. For data transmission, connect the data pin (usually labeled as DIO) on the RF board to one of your chosen digital pins on the Arduino.
Next, install the required libraries in your Integrated Development Environment (IDE). Libraries like “VirtualWire” or “RadioHead” are commonly used for handling communication between multiple antennas. This step ensures that your code can easily interface with the hardware.
After setting up everything physically and installing libraries, upload sample code provided within those library examples onto your Arduino.
Modify parameters according to how you want your setup—such as frequency settings—before testing functionality.
Verify connections using simple test codes available online. Check if you’re receiving signals correctly through serial monitor outputs. Testing early helps identify issues before integrating more complex features into your project.
Typical Use Cases for the Antennino Arduino 433MHz RF Board
The Antennino Arduino 433MHz RF Board is a versatile tool for various applications. Its ability to transmit and receive signals makes it ideal for remote control projects.
Hobbyists often use it in DIY remote-controlled vehicles, allowing them to operate their creations from a distance with ease.
Another common use case involves home automation systems. By integrating the Antennino board, users can create wireless communication between different devices in their homes. This enables functions such as controlling lights or appliances without physical switches, enhancing convenience and energy efficiency.
Moreover, this RF board plays a crucial role in wireless sensor networks. It can be employed to monitor environmental conditions like temperature and humidity by sending data back to a central hub. This feature is particularly useful for agricultural or meteorological applications where real-time monitoring is essential.
Security systems also benefit from the capabilities of the Antennino Arduino RF Board. Users can develop alarm systems that communicate wirelessly with sensors placed around their property, providing alerts without cumbersome wiring installations.
Educational institutions leverage this technology for teaching purposes. Students gain hands-on experience in electronics and programming through projects involving the Antennino board.
Making learning engaging and practical while preparing them for future careers in tech fields.
Power Efficiency and Battery Life with the Antennino Arduino 433MHz RF Board
Power efficiency is a crucial aspect of any wireless project, and the Antennino Arduino 433MHz RF Board excels in this area. Designed with low power consumption in mind, it enables projects to run longer on limited battery resources.
The board’s operational design allows for efficient transmission and reception. This means that when using the Antennino, you can maximize data transfer while minimizing energy use.
It makes an excellent choice for remote sensing applications or IoT devices that require long-term operation without frequent recharges.
Another feature contributing to its power efficiency is its ability to enter low-power sleep modes. By utilizing these modes, users can significantly extend battery life during idle periods, ensuring that energy is conserved until it’s truly needed.
Moreover, pairing the board with appropriate power sources like lithium polymer batteries can enhance performance further.
These batteries provide high energy density and are lightweight—ideal for portable applications where weight matters.
Being mindful of your code and optimizing signal transmission settings will also aid in conserving power. Simple adjustments can lead to more effective usage patterns while still achieving reliable communication over distances.
Tips for Optimizing RF Performance on the Antennino Arduino 433MHz RF Board
To optimize RF performance on the Antennino Arduino 433MHz RF Board, start by ensuring proper antenna placement. A well-positioned antenna can significantly enhance signal quality. Avoid placing the board near large metal objects or electronic devices that may cause interference.
Next, consider using a high-quality antenna specifically designed for 433MHz frequency. These antennas are often more efficient than generic ones and can improve range and clarity of communication.
Pay attention to the length and type of antenna you select; even minor adjustments can lead to better performance.
Shielding is another crucial factor in enhancing RF signals. Employ shielding techniques to reduce noise from external sources. Using ferrite beads on power lines or adding capacitors across power inputs can help minimize unwanted electromagnetic interference.
Adjust your transmission power settings according to your specific needs without exceeding legal limits for unlicensed operation in your region.
Lowering the output power when not needed can also conserve battery life while still maintaining adequate signal strength.
Test different data rates during communication setups as they directly affect reliability and distance capabilities. Optimal data rates vary based on environmental conditions, so experimenting with these options could yield improved results in various scenarios.
Troubleshooting Common Issues with the Antennino Arduino 433MHz RF Board
Troubleshooting common issues with the Antennino Arduino 433MHz RF Board can enhance your project’s reliability. One frequent problem users encounter is a lack of signal transmission. This often happens due to improper wiring or loose connections. Double-check all components and ensure that the board is connected correctly.
Another issue may arise when trying to receive signals. If you experience erratic behavior, interference from other devices might be the culprit.
It’s vital to operate in an area free from competing RF sources, which could disrupt communication between modules.
Power supply problems can also hinder performance. Ensure that you are using an appropriate voltage level for your board—too much or too little power may cause it not to function properly at all.
Consider testing with different power sources if issues persist.
If programming errors occur, check your code carefully for syntax mistakes or incorrect pin assignments. Utilizing example sketches provided by manufacturers can help identify where things might have gone wrong.
Ensure you’re using compatible libraries for coding purposes; outdated libraries may lead to failures in functionality as well. Keeping everything updated will support smoother operations and compatibility across projects.
Where to Buy the Antennino Arduino 433MHz RF Board
Finding the Antennino Arduino 433MHz RF Board is straightforward. Several online retailers specialize in electronics and DIY components, making them reliable choices for your purchase.
Platforms like Amazon offer a wide range of options. You can easily compare prices, read customer reviews, and check shipping times. This convenience allows you to make informed decisions before buying.
Another excellent source is eBay, where both new and used boards are available at various price points. It’s worth exploring auctions or “buy it now” listings for potential bargains on the Antennino board.
For those who prefer direct purchases from manufacturers or distributors, websites like SparkFun and Adafruit stock this RF board along with other related components.
These sites often provide detailed specifications that help ensure compatibility with your projects.
Local electronics shops may carry the Antennino Arduino 433MHz RF Board as well. Supporting small businesses not only helps your community but can also save on shipping costs if they have what you need in stock.
Future Developments and Community Projects Using the Antennino Arduino 433MHz RF Board
The Antennino Arduino 433MHz RF Board has sparked interest in various communities, leading to exciting developments and innovative projects.
As more enthusiasts adopt this versatile board, collaborative efforts are on the rise. Open-source initiatives are flourishing, with developers sharing their designs and applications online.
Community forums serve as platforms for users to exchange ideas, troubleshoot issues, and showcase their unique implementations of the RF board.
Projects range from simple remote control systems to complex home automation setups that utilize multiple boards working together seamlessly.
Antennino’s potential doesn’t just lie in personal DIY projects; it also opens doors for educational programs focusing on wireless communication technologies.
Workshops aimed at teaching students about radio frequency technology often incorporate the Antennino board due to its accessibility and ease of use.
Future iterations may integrate advanced features like enhanced security protocols or improved range capabilities based on user feedback and community contributions.
This collaborative spirit promises continuous improvements and novel applications within smart cities or IoT devices.
As you explore your own projects using the Antennino Arduino 433MHz RF Board, consider tapping into these resources for inspiration or support. The future looks bright with endless possibilities waiting to be discovered by creators around the globe.

